Sunday, 4 September 2011

Apple Chutney!

My parents bought some apple trees last year and so this year they had their first harvest, of so many apples I don't think they knew what to do with them! So Mum delivered me a bucket load of home grown apples to my delight last weekend! Right - time to give preserving a go....


I bought my first preserving book last year.
 

I have always loved the idea of it and have been meaning to have a go for a while. I also have a plan to make Christmas hampers full of these kind of things this year for friends and family so this looked to be the perfect opportunity to try...

Having looked through the book at all the possibilities of things to do with apples I concluded that this recipe...
...for Apple, sultana and date chutney (or at least an adaption of it) was the best way to go as I already had all of the ingredients or at least subsitutes for the things I didn't in the pantry.
Here's how I did it...
I started off by peeling, chopping and coring all the apples...
 
I then weighed them and found that I had around half of what the recipe stated, so I then halved all the quantities of all the other ingredients too.
I found a suitable pan for everything to fit and cook in...
I went for my faithful stock pot which I have had for so many years now, I bought when I was a student on eBay for around £10 and it has been one of my most useful and reliable pans ever since, perfect for soups, pasta, especially spaghetti and now preserving too!


I then  added the following....
2 ONIONS
DICED
2CM OF ROUTE GINGER
DICED
AROUND 50G OF RAISINS (IN PLACE OF THE SULTANAS AS THEY WERE WHAT I HAD IN)
AROUND 50G OF PRUNES
DICED
THEN HALF A TEA SPOON OF MUSTARD SEED
Then I gave it all a good stir together before adding....
500ML OF VINEGAR, WHITE BALSAMIC INSTEAD OF CIDER AS IT WAS WHAT I HAD IN
AND FINALLY 250G OF GRANULATED SUGAR
I then gave it all a good stir again and brought it up to the boil before leaving it all to simmer for 1 & 1/2 hrs with the lid on.

This is what it looked like when I came back....


It suggested in the recipe that you should stir for the last 5 minutes of the cooking time, so that is what I did.

Once it had cooled a little I divided it up in my jam jars using my jam funnel (an incredibly useful item which every kitchen should have)...
 I then labelled them all using some of my lovely Cath Kidston labels...

Job done! So pleased with the result. Recipe states to store for a month before using for the best results so that's what I intend to do....

I could really get into this preserving thing! Please let me know what you think.... I always love to hear from you. xx

Chicken Soup for the Soul - with a few added extras!

Chicken Soup is still one of my most comforting comfort foods, and when I'm feeling a little under the weather there is nothing better to make me feel so much better too. My Grandma Jo started the tradition of chicken soup in my lifetime and then my Mum carried it on from there. They would both refer to it as Jewish penicillin due to its healing properties, and placebo or not placebo it always seems to work for me when I am feeling one degree under. Here is my basic method for chicken soup - but tonight I'm going to add a bunch of extra ingredients to make it into a proper meal... it's still cooking right now but smells yummy and as it is at the simmering stage I thought I would take the time to blog the method whilst I was waiting for it to finish cooking. I hasten to add all of this is complete guess work so I just hope it tastes as yummy as it smells as I'm getting seriously hungry....

So I started with frozen batch of home-made chicken soup which I knew I had in the freezer (defrosted in the microwave for 5 minutes before adding straight to the pan to defrost fully and warm through)...

To this I added 2 carrots...

Half a pepper (diced)
Half an onion (diced)
Handful of runner beans from Mum & Dad's garden (diced)
2 small courgette, also from Mum & Dad's garden (diced)
2 of these handfuls of brown spaghetti, snapped in half

1 glove of garlic (crushed)

A good grind of both salt and pepper
Chopped fresh herbs from our garden (I used thyme, basil, chives and oregano, but whatever you have would be fine)
All the lovely ingredients now in the pan....      
Bring to  the boil....

Then place the lid on and leave to simmer for an hour or so...
After a taste test I then decided to add an organic vegatable stock cube (this is fine as there is nothing artificial in it at all so all it does is add a little more natural flavour)
I also added a swig of milk (modelled here by my Adam)
Done!
It was absolutely gorgeous, so nourishing and really filling too. I even, once cooled, kept a second portion in the fridge and heated it up for dinner the following day, the flavours had only intensified and it was even yummier again! So please with the result. Completely made up method - definitely one I will cook again and again!

Tuesday, 19 July 2011

Cupcake Tower!

Love this crafting project featured on Annie's Eats. Looks relatively simple to make too....

From this:


To this:

Wednesday, 22 June 2011

DESERTS: Rum Balls

Another one to try from my lovely friend Cat....

Rumballs

1.) 2 pkt Marie biscuits
2.) 2 tin condensed milk
3.) 1/2 cup cocoa
4.) 2 cups coconut +
5.) a couple of tiny drops of white rum (optional) I prefer without. 

Crush 1.) to resemble fine crumbs. Mix in 2.),  3.) & 1 cup of coconut, mix well until all ingredients are fully combined, moist & sticky ;)))
Using a desert spoon or teaspoon, scoop small (bite size) spoon fulls & drop into a large dish of the remaining coconut, (hint: keep a cup of boiling water handy, for dipping the spoon, this will help the mixture slide easily of the spoon)
Coat each chocolate ball thoroughly in coconut and roll firm in the palms of your hands.. It gets messy, so you'll need to stop & wash a few times... 

makes about 40.. & you can eat them all in a day! ;-)))


CAKES, BAKES & COOKIES: Chocolate & Ginger Cake (to try)

My dear friend Cat just sent me this recipe that I definitely want to try, so I thought I would post before I go and lose it....

Chocolate Ginger Cake

One Christmas, Margaret Ruhl created this recipe as a surprise for her husband who is a connoisseur of chocolate-coated ginger. It tastes and looks fantastic with spikes of ginger rising up out of the icing and is an absolute must for any ginger and chocolate fiend.
Preparation time: 15 minutes
Cooking time: 1 hour
Use: 18 or 20cm (7in or 8in) round cake tin

CAKE

  • 150g (5oz) caster sugar
  • 150g (5oz) unsalted butter
  • 3 large eggs
  • 3 tablespoons of syrup from a jar of stem ginger
  • 150g (5oz) self-raising flour
  • 35g (11/4 oz) cocoa powder
  • 100g (31/2 oz) stem ginger, finely chopped

ICING

  • 100g (31/2 oz) crystallised ginger
  • 100g (31/2 oz) dark chocolate, minimum 60% cocoa solids, broken into pieces

To make the cake, preheat the oven to 180°C/350°F/gas mark 4. Line the base of the cake tin with greaseproof paper. Cream the sugar and butter until light and fluffy. Add the eggs, one at a time, beating well after each addition, then add the stem ginger syrup, and lightly beat again. Sift the flour and cocoa, fold them into the mixture, then fold in the finely chopped stem ginger.
Pour into the cake tin and bake for 1 hour or until a skewer inserted into the centre comes out clean. Remove from the oven and leave in the tin for 10 minutes before turning out on to a wire rack, leaving the paper on. Allow to cool before making the icing.
To make the icing, finely chop the ginger. Melt the chocolate in a heatproof bowl suspended over a saucepan of barely simmering water. Add the ginger and stir well. Once the cake has cooled pour the icing over the cake using a palette knife to spread it.
HINT: This cake is just as delicious with melted Maya Gold Chocolate poured over it.

I'll of course let you know once I've tried it, how it turns out. x

Monday, 13 June 2011

CAKES, BAKES & COOKIES: Nigella Flourless Chocolate Lime Cake (with Margarita Cream)

Adam's Mum, Jacky, cooks this cake fairly frequently and it is just divine! It is definitely on my list of ones to try for myself. I will update this post when I get round to doing it at last but for now, here's the recipe (source: Nigella.com)

Ingredients

  • Gluten Free
  • Nigella Recipe
CAKE
  • 150g dark chocolate, chopped
  • 150g soft unsalted butter, plus some for greasing
  • 6 eggs
  • 250g caster sugar
  • 100g ground almonds
  • 4 teaspoons best-quality cocoa powder, sifted zest and juice 1 lime icing sugar, to dust (optional)
  • 1 x 23cm springform or other round cake tin
MARGARITA CREAM
  • 60ml lime juice (2-3 limes) or from a squeezy bottle
  • 1x15 ml tablespoon tequila
  • 1x15 ml tablespoon triple sec or Cointreau
  • 75g icing sugar
  • 250ml double cream

Method

Serves: 8-10
  1. Preheat the oven to 180°C/gas mark 4, line the base of your cake tin with baking parchment and butter the sides.
  2. Melt the chocolate and butter together either in a heatproof bowl suspended over a pan of simmering water, or in a microwave (following manufacturer’s instructions), then set aside to cool slightly.
  3. Beat the eggs and sugar together until about tripled in volume, pale and moussy. I do this using a freestanding mixer, but a hand-held electric model would be just fine too; obviously, by hand is possible but would demand tenacity and muscle.
  4. Mix the ground almonds with the cocoa powder and fold this gently into the egg and sugar mixture, followed by the slightly cooled chocolate and butter. Finally, fold in the zest and juice of your lime.
  5. Pour and scrape this mixture into the prepared tin and bake in the preheated oven for 40–45 minutes (though start to check at 35); the cake will be just firm on top, but still have a bit of wobble underneath.
  6. Remove from the oven and sit the cake in its tin on a wire rack to cool. Once the first heat has left it, drape a clean tea towel over the cake to stop it getting too crusty, though a cracked and cratered surface is to be expected; it’s crunch I’m avoiding here.
  7. When cold, unmould, dust with icing sugar if you wish and serve with the jaunty Margarita Cream that follows.

MARGARITA CREAM
  1. Stir the lime juice, tequila and orange liqueur togather in a good-sized bowl, then whisk or fork in the icing sugar and let it dissolve in the sour, strong liquid.
  2. Slowly whisk in the double cream and keep whisking until you have a light, floaty, aerated mixture, then serve with the Chocolate Lime Cake above.

Saturday, 11 June 2011

CAKES, BAKES & COOKIES: Yummy Scrummy Carrot Cake

This has to be one of my favourite cakes, I found it on Good Food Magazine's website - it is just so yummy every time. The only changes which I make to the recipe is that I tend to use Lemon in the place of Orange and Standard Soft Brown Sugar in the of Muscovado...

Ingredients....
  • 175g light muscovado sugar
  • 175ml sunflower oil
  • 3 large eggs , lightly beaten
  • 140g grated carrots (about 3 medium)
  • 100g raisins
  • grated zest of 1 large orange
  • 175g self-raising flour
  • 1 tsp bicarbonate of soda
  • 1 tsp ground cinnamon
  • ½ tsp grated nutmeg (freshly grated will give you the best flavour)
 Method...
  1. Preheat the oven to 180C/Gas 4/fan 160C. Oil and line the base and sides of an 18cm square cake tin with baking parchment. The easiest way to do this is to cut two long strips the width of the tin and put each strip crossways, covering the base and sides of the tin, with a double layer in the base. 
  2. Tip the sugar into a large mixing bowl, pour in the oil and add the eggs. Lightly mix with a wooden spoon. Stir in the grated carrots, raisins and orange rind.
  3. Mix the flour, bicarbonate of soda and spices, then sift into the bowl. Lightly mix all the ingredients - when everything is evenly amalgamated stop mixing. The mixture will be fairly soft and almost runny.
  4. Pour the mixture into the prepared tin and bake for 40- 45 minutes, until it feels firm and springy when you press it in the centre. Cool in the tin for 5 minutes, then turn it out, peel off the paper and cool on a wire rack. (You can freeze the cake at this point.)
  5. Beat together the frosting ingredients in a small bowl until smooth - you want the icing about as runny as single cream. Set the cake on a serving plate and boldly drizzle the icing back and forth in diagonal lines over the top, letting it drip down the sides.


Friday, 10 June 2011

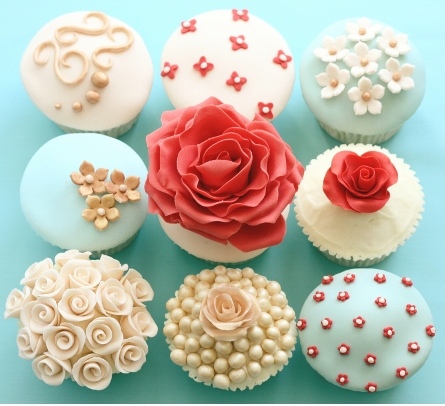
I've actually fallen in love with these flower cupcakes!!

Not that I could probably make them in a million years but they are just the prettiest things I have ever seen so I did just have to, HAVE TO, post them....


Featured on Emmaline Bride
And these ones too, also featured on Emmaline Bride


More Fabulous Cupcakes this time featured on Belle Maison

Tuesday, 7 June 2011

Saturday, 7 May 2011

PRESERVES: Onion Chutney Recipe which I must try at some point soon...

Easiest thing ever :)...

Used 12 red onions, chopped them (I used quite chunky pieces) put them in a pot with some olive (or sunflower) oil and cook them until tender, then I added 3 cups (or 22 table spoons) of brown sugar (white one works, too) and 500ml of vinegar (used red wine as it was cheap but sherry or balsamico works,too), some bay leaves, 15 crushed pepper corns and then let it simmer for around 1.5-2 hours until it has nice chutney consistence. (you can also add some garlic, mustard or cranberry jelly). Then when still warm put it in sterilised jar)
This made one big jar of chutney. Tomorrow I will try to make pumpkin apple cognac cinnamon jam :) a bit in preserving mood at the moment

Shopping list:
12 red onions (got them for 1 pound)
1 bottle of re wine vinegar (1.19 pound)
Pack of brown sugar
Bay leaves
Black pepper corns

As donated by my lovely friend Christina...